|
TI-83 Plus BASIC Programming Tutorial: A Beginners' Guide
|
TI-83 PLUS BASIC PROGRAMMING TUTORIAL:
A BEGINNERS' GUIDE v2.5
[Download This Tutorial]
By: Boris Cherny
NOTE: In order to fully appreciate programming the TI-83+,
I suggest that you first get the Ti Graph Link 83+ Application
for your PC, which makes it easier to visualize and create the
program. I suggest you get the following applications for your
PC before you start programming:
TI Graph Link 83+, 83i Viewer, TI Connect, and an Emulator
You must also get the black serial cable or a TI Connect cable
in order to connect your TI and computer.
I will try to include these programs with this guide, as well as a few
programs for your enjoyment. You are free to tinker with them as
you wish. You may put them on the internet or sell them as long as:
- You change them somehow
- You give Boris Cherny credit
I'd also like to thank a few people, who really helped me out with this tutorial:
~Ilya S~
~Tom T~
For Beginners, I suggest reading this tutorial from the very beginning
and trying every sample program, taking a shot at every challenge.
Have fun!
T
A
B
L
E
O
F
C
O
N
T
E
N
T
S
BEGINNING TOPICS
DISP Function
There are three ways to output text: DISP, OUTPUT, and TEXT. Right now I will be covering the most basic of these methods, DISP. This command displays a phrase on the next available line (the line closest to the top of the screen with no text on it). This command is accessed through PRGM>I/O>3. Remember to always start and end with quotes. Here is an example:
 : Disp "TUTORIAL"
OUTPUT Function
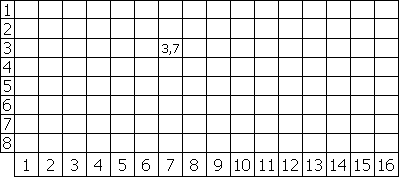
Computers have a different coordinate plain than standard mathematics does; y starts at the top, while x starts at the left. The TI-83 Plus screen is 8 characters tall by 16 characters wide:
While the DISP function is an important command, you will find yourself using OUTPUT much more often. Unlike DISP, output prompts you for a certain location, or coordinate, to output your text, plus it has automatic text wrapping. This command is accessed through PRGM>I/O>6. Start and end with quotes. Here is an example:
 : Output(3,2,"TUTORIAL")
SHORTCUT! It is also perfectly fine to negate the closing quote and parenthesis:
: Output(3,2,"TUTORIAL
CLRHOME Function
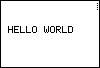
CLRHOME is an essential command, used for clearing the current screen (frame). It is usually initially used at the beginning of the program to clear the .prgm(name). at the top of the screen. Access it through PGRM>I/O>8. I suggest you make it the first command at the beginning of most frames. Here is an example:
 : ClrHome
: Disp "HELLO WORLD"
Notice that this time there is no annoying "prgmTUTORIAL" at the top of the screen before the main text.
LBL/GOTO Functions
The LBL command is used to label frames, duh. This command leads to sloppy coding, so only use it when you have to; you WILL have to. The GOTO command is used to go to a pre-designated frame. They are accessed by going to PRGM>9 and PRGM>0. Here is an example:
 : Lbl A
: ClrHome
: Output(4,2,"HELLO WORLD"
: Goto A
This will keep flickering the text 'HELLO WORLD' on and off, until you press the ON button and select QUIT.
 The frame is labeled 'A', and the text 'HELLO WORLD' is displayed at coordinates (4,2). Then the calculator is told to go back to frame 'A', clear the screen (CLRHOME), and output the same message again. This is all done at such a high speed that it just flickers 'HELLO WORLD'. This is quite useless, so we need some kind of command to stop this continuous loop, so it will actually be useful...which brings me to my next point.
END/PAUSE Functions
What would you do if you entered in a command, and it kept looping over and over, like the LBL/GOTO example? Well, the answer is simply to put something there to say that the loop has got to stop. The END command is used for ending loops or signifying that this is the end of the frame. END is used in such loops as FOR, WHILE, GETKEY, INPUT, and many others. The PAUSE command is used as a kind of dam, to wait for the user to press ENTER before continuing on to the next frame or step and the dam exploding and killing all the little villagers. They are accessed through PRGM>7 and 8. Here is an example:
: Lbl A
: ClrHome
: Output(4,2,"HELLO WORLD"
: Pause
: ClrHome
MENU Function
Menus are widely used: to start games, to quit, to select a choice from a list... So how do you make one? The TI is already programmed with a neat little command called MENU. It is accessed through PRGM>C. Here is an example:
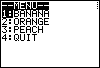 : Menu("--MENU--","BANANA",1,"ORANGE",2,"PEACH",3,"QUIT",X)
You cannot have more than seven items on the menu, because the screen is only 8 characters high, and the title takes up one of those lines. The first word in a menu is the title, and then the items, and what frame to go to if they are selected.
INPUT/PROMPT Functions
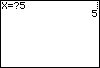
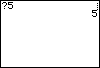
INPUT and PROMPT are two ways to get the same outcome. They are both commands to ask the user for some kind of input, be it number, letter, or essay. INPUT needs more attention, and cannot just ask for a number and end; but PROMPT can simply collect a variable and end its loop. INPUT can collect STRINGS, but prompt cannot. Later I will teach you how to compare the answer to a pre-set variable. This will lead into VARIABLES, because they must be used here. The commands are accessed through PRGM>I/O>1 or 2. Here are some examples and possible situations:
 : ClrHome
: Prompt X
: Disp X
: Pause
 : ClrHome
: Input X
: Disp X
: Pause
: Stop
: End
STOP Function
The STOP command overrides and stops any active processes. For example, in the previous example, we used STOP to end the process of asking for a variable and then outputting it. STOP is also commonly used to end FOR loops (explained later). STOP is accessed through PRGM>F.
VARIABLES
Variables are seen every day: in algebra, in logic, in science, geometry, etc. Since programming is a mix of math and logic, variables are used extensively in it. They are used for defining a number or string and then storing it as a single letter. This makes it much easier on the programmer to call up a number (let.s say the number was 1,243,822,256,012,355,566,761). Variables are also used for numbers which change, and you do not know what its previous value was. For example, lets say a user.s score was 0, and you stored that value as the variable 'X'. During a game, you do not know if the user got the entire bonus, got any bonus at all, or got only partial score. In that case you would tell the calculator to save the user's score as the variable X, and no matter what it was before, the value would never be dependant on the previous value (e.g. X+10, X+100000, X-4, etc.).
 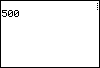
: ClrHome
: 250 A A
: 500B
: Output(2,1,A
: Pause
: ClrHome
: Output(2,1,B
: Pause
In this example, the numbers 250 and 500 were stored as the variables A and B, to be later outputted at the coordinates (2,1).
REVIEW
CYLINDER AREA: Design a program to ask the user for the side length and radius, and then output the area of the cylinder.
CYLINDER AREA ANSWER
COUNTING: Design a program that counts from 0 to 2000, and displays every number, so you can see the numbers 0 through 2000 being displayed on the screen.
COUNTING ANSWER
SIMPLE MOVEMENT: Design a program in which, first, the user selects an option from a list: Up, Down, Left, Right, or Explode; and then, a single character is displayed which performs the function.
SIMPLE MOVEMENT ANSWER
MORE ADVANCED TOPICS
FOR Function
FOR is a function used, at a beginner's level, as a kind of wait function- it counts from the first number to the second number at intervals of the third number. It is also used to display something for a certain amount of time. How it would work is for([variable A-Z], [starting number], [ending number] , [interval]). The lower the number the less time (duh). An END command must be put where you want the loop to end. Sometimes STOP is also used to force the loop to end. This command is accessed through PRGM>4. Here is a simple example:
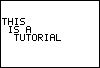
: ClrHome
: For(A,0,50)
: Output(3,1,"THIS"
: End
: For(A,1,50,20)
: Output(4,2,"IS A"
: End
: For(R,9,500,10)
: Output(5,3,"TUTORIAL"
: End
The strings (lines of text) will appear one by one, FOR signifying to the calculator to keep the line up for the designated time before executing the next part of code. However, once the whole program ends, there is a final END, and the calculator automatically restarts the program once the user presses ENTER.
How END works behind the scenes: In this case, the calculator is told to save into the variable .A. the changing value of 0 to 50. Since Basic is such a slow language, .THIS. is outputted at the coordinates (3,1) for a few seconds, or how long it takes the calculator to count from 0 to 50.
WHILE Function
While is also a loop: it continues until a certain condition is true. However, unlike FOR, WHILE does not automatically add one to the value of a variable each time around; you must tell it to add or subtract a certain amount. This makes it more flexible of a loop. Here is an example of its use:
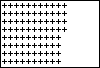
: ClrHome
: 1Y
: While Y 16 16
: 1X
: While X8
: Output(X,Y,"+"
: X+1X
: End
: Y+1Y
: End
Here's the breakdown: The screen is cleared and the value of the variable 'Y' is set to 1. While Y is less than or equal to 16, make the value of X equal to 1. While the value of X is less than 8, output at the coordinates (X,Y) a plus sign (+). Add 1 to the value of X and repeat until X hits 8, at which point continue the outer loop and set X back to 1. Also add 1 to Y. Therefore, this column of X's is displayed over and over again, with the Y becoming 1 larger each time a column is completed, until Y hits 16 and the program ends.
 If you code While 1, the operation within this while loop will be repeated forever, unless a command is in place to stop it, for example if the user presses ENTER then the loop stops. If you code While 0, the code between this and End will not execute. This is because computers rely on bits, tiny jolts of electricity, to transfer information. A small voltage stands for 1, and no voltage stands for 0. Therefore, 1 stands for True, because there is a current present, and 0 stands for False, because there is no current. A good way to represent this is a light switch: when it's on, there is a current, and when it's off, there is no current. So when you code While 1, what you are actually saying is While True.
Compare This
Following is an example for a bit more advanced use of the FOR function, you will find yourself using this much more often than the previous bit of code. Some of the other functions used here are explained later in this tutorial. I will compare 3 functions: FOR, WHILE, and LBL/GOTO. These programs are exactly the same visually, although what really goes on behind the scenes is drastically different. Please run all three of these programs on your TI, in order to see the differences (e.g. the LBL/GOTO example takes much more time than the others). I will try my best to explain the behavior of these programs. Please first set your WINDOW to:
Xmin=-100
Xmax=100
Xscl=1
Ymin=-100
Ymax=100
Yscl=1
Xres=1
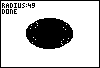
EXAMPLE I: FOR
: ClrDraw
: For(X,0,50)
: Circle(0,0,X)
: Text(0,0,"RADIUS:",X
: End
: Text(6,0,"DONE"
 The drawing screen is cleared, and the variable X is assigned the value of 0. A circle is drawn at the coordinates (0,0) (in the center of the screen). Its radius is set to 0. At the coordinates (0,0) the text "RADIUS:" is displayed, with the value of X following it, whatever that value may be. The command END tells the calculator to execute the code between FOR and END until the value of X is 50. The text "DONE" is then displayed.
EXAMPLE II: WHILE
: ClrDraw
: 0X
: While X<50
: Circle(0,0,X)
: Text(0,0,"RADIUS:",X
: X+1X
: End
: Text(6,0,"DONE"
The screen is cleared like before, and the value of 0 is assigned to the variable X. While X is less than 50, A circle is drawn at the coordinates (0,0) with a radius of X. At (0,0) the text 'RADIUS:' and the value X are displayed. 1 is added to X, and this whole process is repeated until the statement 'X is less than 50' is false (so X has to be more than 50). When this happens, 'DONE' is displayed.
EXAMPLE III: LBL/GOTO
: ClrDraw
: 0X
: Lbl 1
: Circle(0,0,X)
: Text(0,0,"RADIUS:",X
: X+1X
: If X=50
: Goto 2
: Goto 1
: End
: Lbl 2
: Text(6,0,"DONE"
The drawing screen is cleared, and 0 is assigned to X. The following is assigned to frame 1: a circle is drawn at (0,0) with a radius of X. 'RADIUS:' and the value of X are displayed, and the value of 1 is added to X. If X is equal to 50, the calculator is told to scan the program for a frame labeled 2; otherwise scan for a frame labeled 1 and go there. If X is equal to 50, the calculator goes to frame 2 and the text 'DONE' is displayed.
As you can clearly see through the code, FOR is the cleanest and most efficient way to draw a circle and keep increasing its size, then WHILE and finally LBL/GOTO.
IF, THEN, ELSE, OR Functions
These are a few of the most widely used functions in programming, because they compare values, inputs, strings, and variables. ELSE means that if the variable is not a certain value, then whatever ELSE it may be, do something. IF compares the value to a predesignated variable, and THEN does something. The OR command compares the value to many variables. IF, THEN, and ELSE are accessed through PRGM>1,2, or 3. OR is accessed through TEST>LOGIC>2. Here is an example:
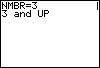
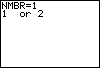
: ClrHome:Input "NMBR=",X
: If X=1 or X=2:Then
: Output(2,1,"1 or 2"
: Else:Output(2,1,"3 and UP"
: Pause
: ClrHome
Note: In order for ELSE to work, the comparison must use THEN. However, these are usually inefficient commands. If you want to make this code more functional, try this:
: ClrHome:Input "NMBR=",X
: If X=1 or X=2:Output(2,1,"3 and UP"
: If X3:Outout(2,1,"3 and UP"
: Pause:ClrHome
This revised version of the program uses two less lines of code, and works the same.
STRINGS
STRINGS are a subdivision of variables, which store words, phrases, letters, etc. They are used in conjunction with input, but they collect lines of text, like 'Mary had a little lamb'. They are accessed through VARS>STRING.>0-9. Here is a simple example:

: ClrHome
: Input "NAME:",Str1
: Output(2,1,"NAME IS: "
: Output(3,1,Str1
: Stop
: End
GETKEY Function
GETKEY is probably one of the most widely used functions. Did you know that every button on the TI-83+ has a number assigned to it? GETKEY is like INPUT, but it waits for a key press, not a number input. This is sometimes used for moving a character or for menus. GETKEY is accessed through PRGM>I/O>7. GETKEY is almost always, 90 per cent of the time, used with the following formula:
: While 1
: getKey(variable A-Z)
: While (variable A-Z)=0
: getKey(variable A-Z)
: End
There is also a program that tells you the key value upon pressing the key, if you don.t have a cheat sheet handy:
: While 1
: getKeyA
: While A=0
: getKeyA
: End
: Disp A
: End
Instead of using a variable, it is faster to use ANS; however, this cannot be done when the getKey value must be used over and over again. The whole procedure may be shortened as well:
: While 1
: getKey
: 'Do something here
: End
Not that you have to use 'A', you can use any other letter of the alphabet Here is a simple program which utilizes GETKEY:
: ClrHome
: For(A,0,1)
: getKeyV
: While V=0
: getKeyV
: End
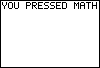
: If V=41
: Disp "YOU PRESSED MATH"
: If V=42
: Dsp "YOU PRESSED APPS"
: If V 41 or 42 41 or 42
: End
Behind the scenes: the screen is cleared, and the value 0 is assigned to the variable A. The calculator collects a key press, and if that key press is the MATH button, "YOU PRESSED MATH" is displayed. If APPS is pressed, "YOU PRESSED APPS" is displayed. If neither is pressed, nothing is done. The END command tells the FOR loop to repeat with 1 more than its previous, but since this loop is supposed to end when its value is 1, the program ends. Notice how much cleaner the program looks without those LBL/GOTOs, even though it would have taken a bit less* brainpower to code those than the FOR loop.
RAND, RANDINT, iPART, AND fPART Functions
Sometimes in a program you must tell the calculator to automatically pick a random number between two boundaries, and sometimes you use the integer part, sometimes the decimal.
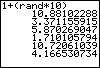
The RAND command picks a random number from 0.0000000001 to 1 and displays it. You can multiply it by numbers or manipulate it to your needs, like:
: 1+(rand*10)
The above can display any number, integer or not, from 1 to 11. But what if you want only the integer part of it?
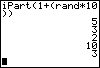
: iPart(1+(rand*10))
The above displays any integer between 1 and 11. But what if you want only the decimal part?
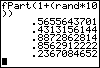
: fPart(1+(rand*10))
A much easier way to select a random integer between 1 and 10 would be the following:
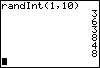
: randInt(1,10)
RAND is accessed through MATH>PRB>1
RANDINT is accessed through MATH>PRB>5
IPART is accessed through MATH>NUM>3
FPART is accessed through MATH>NUM>4
LISTS
On your TI calculator, there are six standard lists: L1, L2, L3, L4, L5, and L6. However, if you use these for storing program and game information, they are very likely to get sabotaged by other programs which use the lists and when you graph scatter plots. Therefore, your calculator has the potential to hold hundreds of user made lists, which you may name with any four letters and numbers. However, a number cannot be the first digit. Create lists the following way:
: 10dim(LTTRL)
In the above example, 10 is the number of slots in the list, and TTRL is the name of the list. There is always a little L, accessed through 2ND>STAT>OPS>B, before the name of the list. To store the variable 'C' into the first slot of the list TTRL, use the following formula:
: CLTTRL(1)
To call upon the first slot of the list TTRL and store it as the variable 'B' (used for displaying high scores) use the following formula:
: LTTRL(1)B
MATRICIES
Matrices are just another form of lists, but they are used for storing very large amounts of information. Create a matrix with the following formula:
: {2,3}dim([A])
2 and 3 are the dimensions of the matrix (tall x wide), and 'A' is the name of the matrix.
REVIEW
ADVANCED MENU: Create a menu, without using the MENU function, which has 5 choices, a title, and some kind of cursor.
ADVANCED MENU ANSWER
MOVE: Create a program in which a user-controlled character moves around on a screen, and when they collide with a side of the screen they appear on the other side. If they collide with a character, 'O' located at the coordinates (1,1) the program ends and if they collide with an 'S' symbol, located at random coordinates (not the same ones as the 'O'), and if the user (a pi symbol) collides with it, the text 'BONUS' flashes 5 times, and the game continues, and 10 points are added to the score (saved as a list).
MOVE ANSWER
DRAWING FUNCTIONS
CLRDRAW Function
CLRDRAW is like CLRHOME, except it clears the drawing screen. Consider the TI-83+ as having screens: One where pictures, lines, and text go; the second where outputs go. CLRDRAW is accessed through 2nd>PRGM>1.
TEXT Function
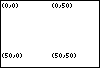
TEXT is like OUTPUT, except that TEXT is much smaller, and the coordinate plain is pixel-based. TEXT doesn't have text wrapping, like DISP. TEXT appears on the drawing screen, not on the output screen. The TEXT screen is 62 pixels high by 94 pixels wide. The screen starts with the coordinates (0,0) in the very top left corner. Text is accessed through 2nd>PRGM>0. Try this example below to get a sense of how the coordinates work:
 : ClrDraw
: Text(0,0,"(0,0)"
: Text(50,0,"(50,0)"
: Text(0,50,"(0,50)"
: Text(50,50,"(50,50)"
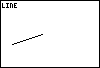
LINE,TANGENT, VERTICAL, and HORIZONTAL Functions
HORIZONTAL and TANGENT are the same thing, they both give you a horizontal line. VERTICAL gives you a vertical line, and LINE gives you a line from the first coordinate to the second.
NOTE: You should first set the graph window to:
Xmin=0
Xmax=94
Xscl=1
Ymin=0
Ymax=62
Yscl=1
Xres=1
Try the following example to give you a sense of what these functions do:
 HORIZONTAL is accessed through 2nd>PRGM>3
VERTICAL is accessed through 2nd>PRGM>4
TANGENT is accessed through 2nd>PRGM>5
LINE is accessed through 2nd>PRGM>2
: ClrDraw
: Horizontal 50
: Text(0,0,"HORIZONTAL"
: Pause
: ClrDraw
: Vertical 50
: Text(0,0,"VERTICAL"
: Pause
: ClrDraw
: Tangent(50,2,"TANGENT"
: Pause
: ClrDraw
: Line(10,20,40,30)
: Text(0,0,"LINE"
: Pause
: ClrDraw
SHADE Function
SHADE does exactly what it should do: shade a certain region of the screen. It is accessed through 2nd>PRGM>7. Here is an example:
 : ClrDraw
: ZStandard
: Shade(-10,5)
Note: The command ZStandard is a short way to set the WINDOW to:
Xmin=-10
Xmax=10
Xscl=1
Ymin=-10
Ymax=10
Yscl=1
Xres=1
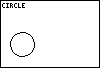
CIRCLE Function
Circle (obviously) creates a circle on the designated coordinates. It works like this: Circle([X coordinate of origin],[Y coordinate of origin],[radius]). The circle will look like an ellipse because the TI screen is a rectangle, unless you set the screen to:
Xmin=0
Xmax=94
Xscl=1
Ymin=0
Ymax=62
Yscl=1
Xres=1
Here is an example:
 : ClrDraw
: Circle(20,20,12)
: Text(0,0,"CIRCLE"
Pt-On and Pt-Off Functions
Pt-On puts a dot at a certain location on the screen, and Pt-Off takes away that dot. If you are forced to delete a dot during a program, use this command instead of CLRDRAW, because the screen won't flash when this is done. Note: first set your p to:
Xmin=0
Xmax=90
Xscl=1
Ymin=0
Ymax=90
Yscl=1
Xres=1
Here is a little program to accustom you to the Pt-On command.
: ClrDraw
: For(A,0,90)
: randInt(1,90)X
: Pt-On(X,A)
: End
This will randomly display pixels between (0,0) and (90,90). It will display a total of 90 pixels.
NESTED LOOPS
Nested loops are two loops; say FOR and WHILE, working together, with one loop inside of the other. This is a very common occurrence when a certain process must be repeated over and over.
CHALLENGE: Create a program that draws a circle, without using the CIRCLE function, and keeps increasing its size, in 10 lines of coding or less. Use two types of loops. I strongly encourage you to at least try making this program before continuing.
VIEW THE ANSWER
CHALLENGES
Now that you have learned to program, try to create the following:
- A guessing game, where the user guesses numbers until he gets a random number selected beforehand by the calculator, with difficulty levels.
- A fighting game, with health, a store, different enemies, weapons, armor, etc, with graphics and animation.
- A quadratic formula program, which outputs the number of roots and the x-intercepts upon the user inputting the values of A, B, and C.
- A long division program, which outputs the whole answer and remainder.
- A conversion program, which can convert:
- F into C
- C into F
- Cm into in
- In into cm
Feel free to email me at pickledcherry668@yahoo.com with questions, comments, or feedback!
History:
V1.0 initial version March 2004
V2.0 better descriptions, screenshots, initial review section , initial challenges
V2.5 better descriptions, more functions, more screenshots, examples available for download, code available for all functions, easier to use, more advanced functions, review section, more challenges
Written by Boris Cherny
|
|
|